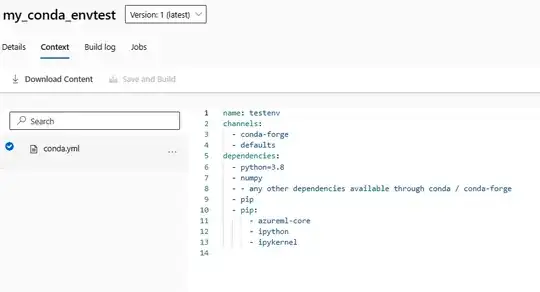
I have registered a custom environment (through Environments tab) in Azure Machine Learning (providing Docker file and conda_dependencies.yaml) which I plan to use for training jobs. Now I would like to be able to use this environment also in AzureML notebooks for experimentation and development of code that I finally plan to use for the training jobs.
I am wondering whether there is a way to create a kernel in AzureML notebook that is based on the registered environment from the previous step?
I have followed multiple tutorials to do this, in particular:
- https://learn.microsoft.com/en-us/answers/questions/764339/how-to-use-custom-environment-defined-in-the-custo
- https://medium.com/analytics-vidhya/how-to-create-virtual-environments-in-azure-ml-workspace-in-azure-portal-39245a34b370
- How to run notebooks in Azure ML with a specified custom environment
I am able to create new conda venv in AzureML notebook (in terminal session from conda_dependencies.yaml file or simply as new venv and install packages manually one by one) and create a new kernel based on this venv. What I am not able to do is to create the venv based on the registered environment that I have already created in the Environments tab. Based on the documentation (link) there should be a way to do this by using Environment.build_local() method, but it does not work for me.
I tried to run the following code:
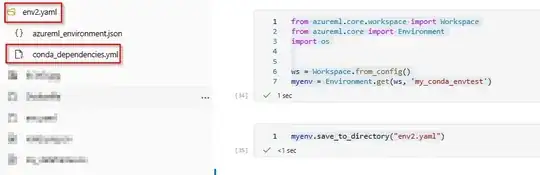
from azureml.core.workspace import Workspace
from azureml.core import Environment

ws = Workspace.from_config()

myenv = Environment.get(ws, 'my_previously_registered_environment')

myenv.build_local(ws)
This code runs only for few seconds and outputs the following:
Saving setup content into /tmp/tmpXYZXYZXY
No new venv is created, at least I do not see it by running:
%conda env list
Am I using the Environment.build_local() method in a wrong way (or with wrong parameters)?
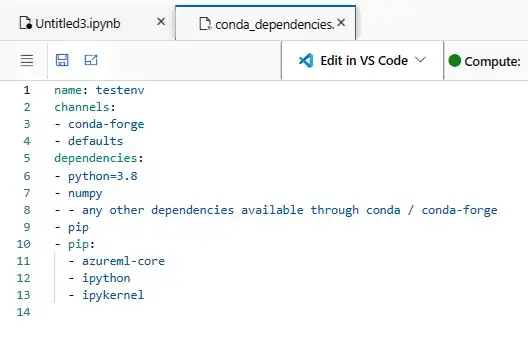
If there is no way to create venv in AzureML notebooks from registered environment using Environment.build_local(), is there at least a way to get the conda_dependencies.yaml file (that I used during environment registration) from AzureML notebook (e.g. is it saved somewhere in storage where I can access it from Python)? I am trying to be able to create the venv and kernel based on the registered environment by running a (simple) script(s) without any manual copying.