We did an amateur photo shooting for a new clothing brand but had some lack of good lighting.
Some pics can be seen at www.tahara.es
What kind of retouching could be recommended on Lightroom or PS?
Thanks!
We did an amateur photo shooting for a new clothing brand but had some lack of good lighting.
Some pics can be seen at www.tahara.es
What kind of retouching could be recommended on Lightroom or PS?
Thanks!
So, looks like the photos had lights with different temperatures. Looks like a cool light source on the left and a warm light source on the right.
A straightforward approach would be to take it into Lightroom and apply a gradient with a countering color to cool the colors down from the right or warm up the image from the left, so that you have an equalized image.
Which way you go depends on how you want the final image to look.
EDIT: So, a quick workflow
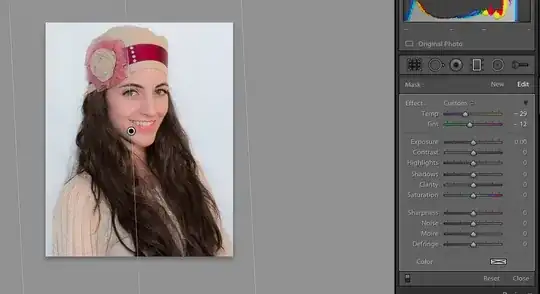

This takes the original from:

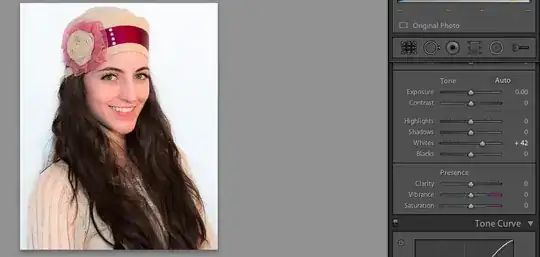
To this more balanced image:
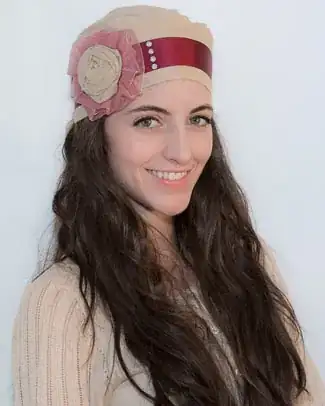
To the background lightened image:
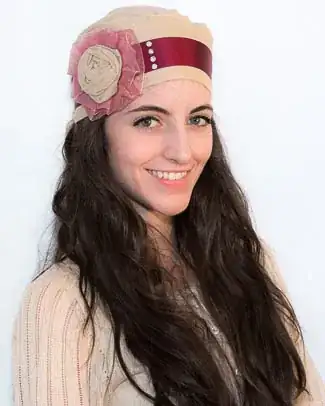
Next time I'd move the models away from the background a bit - there are some harsh shadows in a few shots. Put more light on the backgrounds so they're white. And make sure you illuminate the product as much as you do the models' faces. The faces are pretty well lit, but the hats/scarves are not.
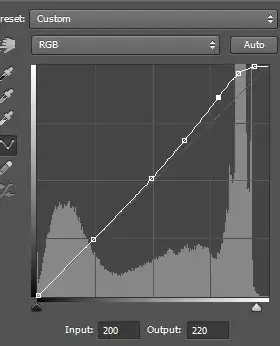
In post processing, I'd blow out the background to pure white so it blends with the white background of the web site. You can do that with a curves layer and some masking.
Given the product is worn on the head, I think you've cropped too close at the top, and I don't think you need to see so much of the model's torso. I'd crop much closer, as I did below, and leave some headroom at the top.
I would also use curves, levels or exposure adjustment (adjustment brush in Lightroom or an adjustment layer in PS) and brighten up the product a bit. I dabbed a soft brush on the headscarf, brightened the background, and also cropped to show the product a bit better - here's a before and after.

Edit: curves layer for background. Moved the white slider at the bottom to the left. Then added some anchor points on the shadows and midtones, and then raised the highlights, so it should only brighten the lightest tones. You might have to mask out some other areas if it affects eyes, teeth or other brighter parts of the subject.
For post processing, the gradient tool has worked well for me in LR.
– Wing Tang Wong Apr 16 '13 at 16:12