Its unfortunate that these headphone jacks are all too often designed to fail. If you take the time, you can learn to repair them and even make them stronger than before.
Materials
You will need wire strippers/cutters, a replacement jack with wire slots, electrical tape, a soldering iron and some solder. The replacement connector should be able to unscrew, revealing the wire slots and solder points. They can be purchased very cheap and are much better to use than an old connector that is not made for replacing.
Preparation
Cut the cable near to the faulty jack. Strip the outer sheath about 1/2". There will likely be three colored wires covered in enamel. First, separate the colors and then you will need to remove the enamel. This can be done using a bead of hot solder which will melt the enamel and tin the wire. Or if you have acetone/nail polish remover and mineral spirits those work well too. If none of those works for you, you will have to carefully scrape off the enamel with steel wool or a knife. This is the most tricky part, but if you don't remove the enamel, the headphones won't work perfectly.
Soldering
Next you have to match each color with the tip, ring or sleeve of the headphone jack. For this type of connector, the tip is left channel, ring is right channel and sleeve is common. Generally the red wire is right channel, the blue wire is left channel, and the bare copper one is common. If the stereo orientation is wrong, reverse the red and blue connections.
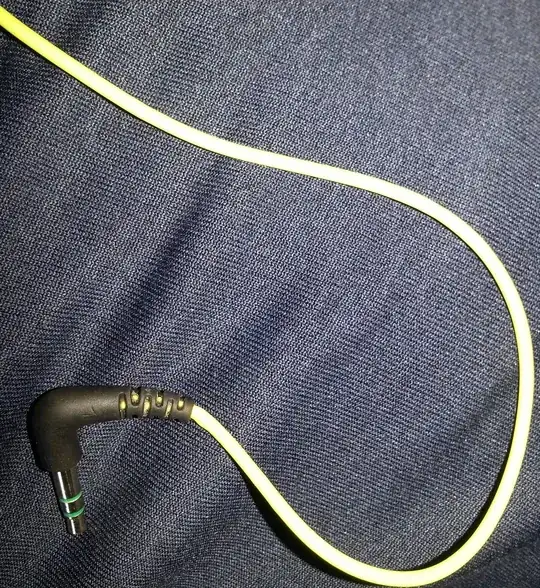
Reinforcement
After testing the audio and L/R orientation, you may need to reinforce the wire with electrical tape and epoxy. Epoxy can be put over the solder joints so that when the cable is pulled, the tension is put on the epoxy instead of on the soldering joints which could make them weaken and break over time. With electrical tape, the idea is to put it thicker near the connector and taper it off. This way, if you pull the wire sideways, the wire will bend like a fishing rod, distributing the load over a few inches instead of just one point.