TL;DR
# 1.
sudo security remove-trusted-cert -d <CERT_FILE_NAME>
2.
sudo security delete-certificate -c <CERT_COMMON_NAME> /Library/Keychains/System.keychain
On Ventura, I added a self-signed certificate to the System keychain using the Import certificates into the System Keychain via the command line thread:
sudo security add-trusted-cert \
  -d \
  -r trustRoot \
  -k /Library/Keychains/System.keychain \
  <CERT_FILE_NAME>
In Keychain Access, under "System",
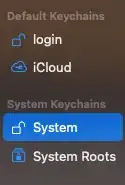 ,
,
the added certificate will show up like this:

Deleting a certificate from the System keychain on the terminal
Step 0. Make sure that Keychain Access is not running.
If you see the little white dot beneath its icon, then quit.

If you forget, the steps below will work to some extent, but the certificate will have to be manually deleted as well, defeating the whole purpose of doing this in the terminal. You will still get an error,

In my case, quitting and starting Keychain Access again didn't help, hence this manual step.
Step 1. sudo security remove-trusted-cert -d <CERT_FILE_NAME>
For example,
% sudo security remove-trusted-cert -d localhost.crt
This is how the certificate looks like in Keychain Access at this point:

Step 2. sudo security delete-certificate -c <CERT_COMMON_NAME> /Library/Keychains/System.keychain
The argument for -c has to be the common name on the certificate (i.e., the CN parameter). This is what shows up in Keychain Access.
In my case, it is lynx_localhost_test. To check it on the terminal, decode the certificate with openssl:
% openssl x509 -in localhost.crt -text | grep 'Subject:'
    Subject: C=US, ST=Denial, L=Springfield, O=Dis, CN=lynx_localhost_test
To check this on the terminal without opening up Keychain Access, before deleting the cert:
% sudo security find-certificate -c lynx_localhost_test


